Are you one of those people who tells yourself that you aren’t good at cooking, so you really never try? It’s just like anything else in life; there are plenty of people who seem to be just born great at it, but there’s always hope for everyone else with a little practice and even minimal effort. (Also, not trying because you assume you can’t do something is a pretty crappy attitude to carry though life 😉 ) I grew up in a family where I was lucky to watch my parents have dinner on the table every night, often times making something out of nothing (we’ve all been there, right?). I didn’t start helping or absorbing anything other than baking until high school (because holidays, everyone helps with that no matter what), so I only had a few basic skills going into college.. you know, that time of life known notoriously for having no money and no nutritional standards.
I’m looking at you, shells and cheese with hot sauce for 4 meals a week.
It’s been 5 years since graduating that stage of life (I don’t want to talk about it) and here are a few things I’ve learned since that you may already relate to:
1. Taking the time to plan and execute a grocery trip and then letting a lot of what you bought go bad is just the worst.
2. Similar point – meal planning is literally always the answer to a stress free week, but a lot of us don’t always have time for that. Consequently, learning to be flexible and make something out of nothing is a quality life skill.
3. You don’t have to be a professional chef every night. Sometimes we have Whole 30 approved zoodle recipes with the perfect amount of leftovers for the next day, protein shakes for breakfast and a good snack to take to work. Other nights I’m not feeling it, and we have whatever’s in the fridge all sautéed together (as long as it won’t take longer than 20 minutes) and it’s everyone for themselves the next day.
4. Pinterest is about as helpful as it is discouraging. I have discovered some new favorites, but then there’s also the times where you’re like, “But I found this awesome looking recipe, why did mine turn out so badly?” – It’s possible that it was a dud in the first place, but it was left there because the picture was pretty.
5. Based on people I know, I’d say that there are two types of cooks out there: people who follow recipes word for word, and those of us who can’t look at one without tweaking it a little bit/don’t follow any at all. I’m the second hands down. (This is basically the left brain/right brain argument all over again) Example, heard in my house when we gave HelloFresh a shot, “But the directions say to do this.” “… the directions are wrong.”
Going back to point number 1… there is nothing worse than trying to plan and budget and ending up with food going bad in the refrigerator. Thankfully, we are heading into the time of year when a soup or stew is always acceptable. If you don’t think you’re great at cooking or you want to be better at improvising, start with one of these! I was going to make a big pot of soup today, but as I started to pull things out I noticed it was mostly beef stew ingredients, and we had stew beef in the freezer. Remember, be flexible!
This write up feels long winded, but I wanted to give instructions that don’t assume that you know how to do everything!
This is an easier classic that is good to have in your arsenal. Here’s my best guess of what went into this (remember that right brain, no recipe thing?)
Recipe
- 3 cups beef broth
- 1 cup red wine (Whatever red you have on hand that isn’t sweet. Don’t cook with something you wouldn’t drink! If you don’t drink at all, wine is being sold in smaller cartons these days that make buying just enough for a recipe easy!)
- 1 tbs Worcestershire sauce
- 1 package stew beef (usually around 1 lb)
- Potatoes (I had a mix of baby potatoes that I cut into half inch pieces, use what you have and however much you want!)
- Carrots (I had an organic mix so that’s why my photo has purple carrots – I used approximately 6 full size carrots)
- Mushrooms (I had half a small package of pre-sliced bella mushrooms – if I had my choice, I would have included a whole pack)
- Half of a red onion (You can use whatever onion you have, I only did red because it was already cut up)
- 2 bay leaves
- 3 cloves garlic
- rosemary
- thyme
- salt
- pepper
- 1/3 cup all purpose flour
- 3 tbs olive oil ( I prefer EVOO)
- kale ( I probably added 3 large leaves)
Start by preheating your oven to 275. Low and slow, baby.
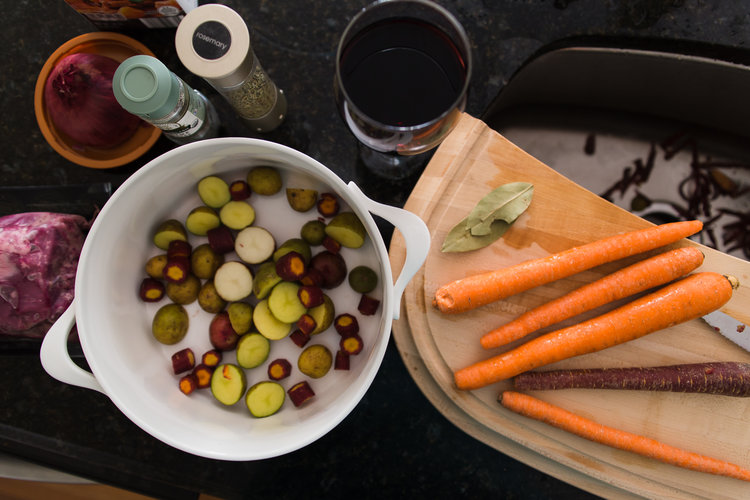
I personally like to lay everything out that I’m going to need ahead of time. I don’t always follow this rule on a busy weeknight, but if you just treat everything like you’re on a cooking show and set it all out you are less likely to loose your mind.
I like to start by handling all of the peeling and chopping – in this case, it only took me about 5 minutes to wash and chop up everything. You can go without peeling carrots, but mine were a little older so I felt better about peeling them first. As I peeled everything, I added it to the dutch oven. At this stage, I added the potatoes, carrots, mushrooms, onion, garlic, rosemary, and thyme.
In general, fresh is best… but most times, you just use what you have. My rosemary and thyme were dried, and I was out of fresh garlic so I used minced in a jar. #stilltastedgood
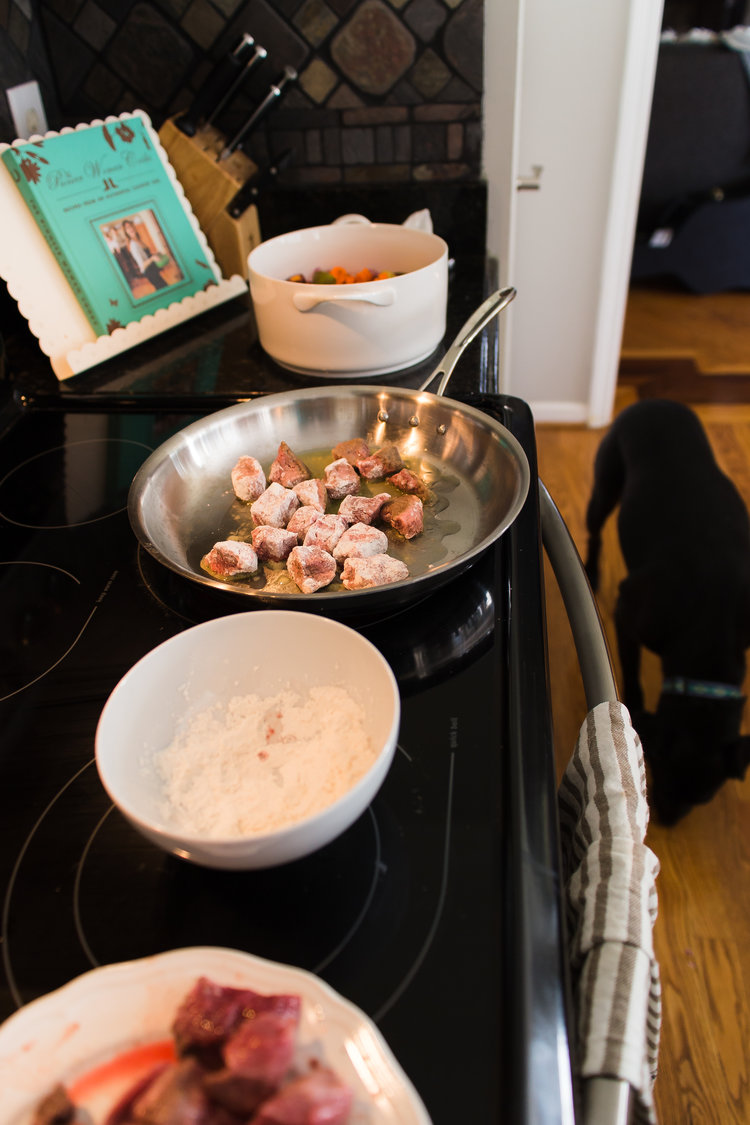
After getting everything else prepped, I started on the meat. Usually when you make beef stew, you flour/sear the meat before adding it to the mix. If this feels like a lot of effort with no discernible purpose, I hear you. But what you’re doing is creating a roux on the front end to make your sauce a little thicker… and since it’s including the browned bits from the meat, it’s adding more flavor. #winwin And it’s truly not that hard. Start by heating the olive oil in a frying pan over medium/high heat. While that gets going, thoroughly salt and pepper the meat. Don’t skimp, bland meat is disappointing. When the oil is hot (don’t let it start smoking a ton; it’s possible to burn olive oil), you’ll dredge the meat in flour to coat it completely, shake off the excess, and then add to the oil. Brown the meat on all sides without cooking it too long; add it to the dutch oven. This process is easier if you work in smaller batches – that way you won’t have to keep an eye on everything at once!
When you’re finished browning all of the meat, use the wine to deglaze the pan. Nothing will make you feel fancier than deglazing… in reality, it’s adding a lot of flavor to your meal and cleaning the pan so cleaning it later won’t be hard. Just dump it in and scratch the brown bits off of the pan. I let the wine simmer for a minute or two to cook down a little.
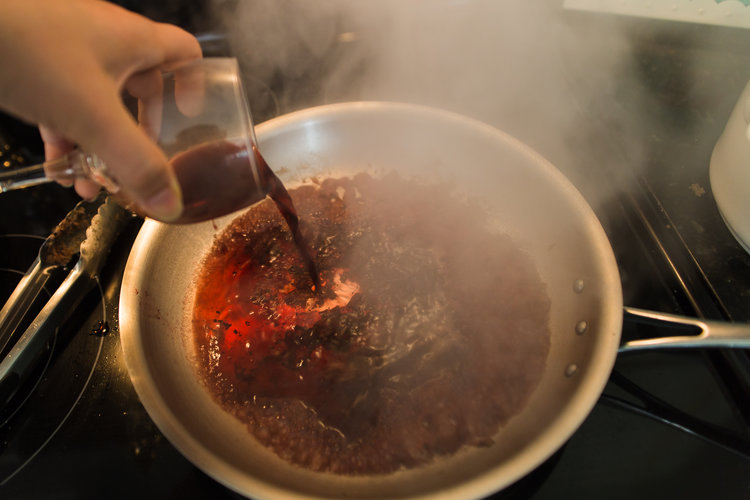
When that’s ready, you’ll just scrape it all into the dutch oven. Add in the beef broth and Worcestershire sauce, then go ahead a put everything in the oven.
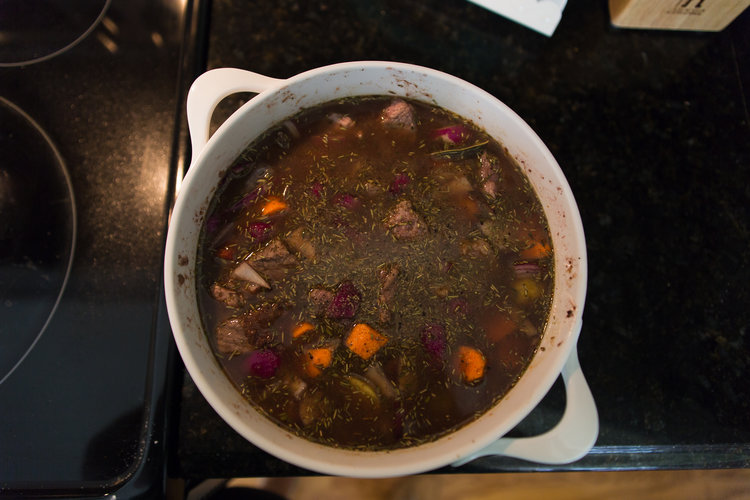
Mine stayed in for about 2 1/2 hours. With 30 minutes left, I pulled it out and added all of the kale. I didn’t take a photo of it, but you want to cut kale away from the stem. I waited to add it later because it takes no time at all to cook!
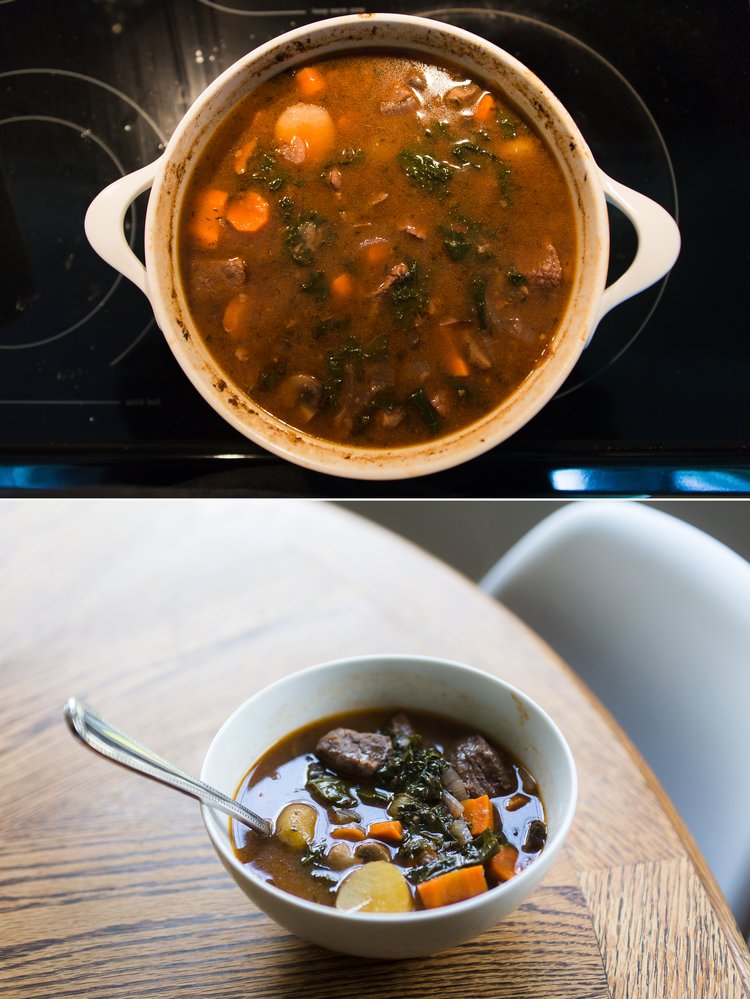
Voila! Usually I taste test as early as possible and decide on the extra salt and pepper situation at that point.
It’s that easy! You can change this up and add in different things as you see fit. Things like this tend to taste better after they’ve sat/blended for a little while, so it’ll probably be even better tomorrow. You can throw on some rice, maybe make some cornbread from a box or a salad from a bag and all of the sudden you have an impressive meal! Sit back and let everyone think you’re awesome… because you are and it’s just that easy. 🙂


Leave a Reply